(Review this topic before initial Import.)
Steps to Process QuickBooks Import: The actual Import process is easy to perform and very speedy. It only requires from you whatever time you need to verify QuickBooks Requirements before you bring the information over.
For more information about Import results, see Items Imported from QuickBooks. You may also benefit from a study of the QuickBooks Integration section of this manual.
Otherwise, after you have done the Preparations listed below, just Start the Import Process and then sit back and watch how your data is seamlessly brought over for you into FieldOne. Depending on the amount of data and the speed of your network, this process should take about 10 - 15 minutes, and in most cases it takes less time than that!
The following are the necessary steps to ensure a proper integration.
Preparations on the QuickBooks side:
| • | Log in to your QuickBooks Company file: |
| ► | Use the Admin User Name. |
| • | If you are not sure if QuickBooks is open in "Multi-User" mode, then check on the Title Bar of QuickBooks . This should say in parentheses, "(Multi-User)." If it does not, then click in QuickBooks on File and then select Switch to Multi-User Mode. |
| • | Keep this file open during the Import process. |
Preparations outside of QuickBooks:
| • | If you are running the Microsoft Windows Vista operating system, make sure that User Account Control is turned On, as recommended by both Microsoft and Intuit QuickBooks. For details see this website. |
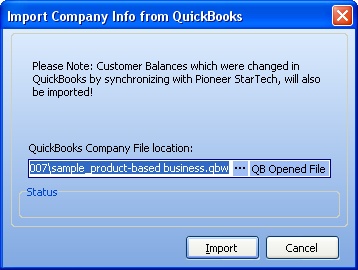
| • | When asked by FieldOne for the file location (path) for the new QuickBooks Company file that will be created inside the application, make sure that you use exactly the same path that you used in QuickBooks to open the file over there. |
| • | Note the Shortcut button called QB Opened File, which should give you the exact file location to use. We explain the difference from the actual location path below: |
| 1. | You opened your Company in QuickBooks using this path |
Z:\MyCompanyFile.qbw
| 2. | Then you should specify the exact same path when asked for it in FieldOne for the Import. |
(In reality, to open this file you would actually use a different path, such as
\\MachineName\MyCompanyFile.qbw
but in order to properly integrate with QuickBooks you need to specify the path the same way that QuickBooks does.
Start the Import Process:
| • | If you are installing FieldOne and have not run the Company Setup Wizard yet, then the best way to import the QuickBooks data is using the Wizard. You will be asked if you would like to do the QuickBooks Import: |
| ► | Just check the select-box |
| ► | Then specify the file location (path) described above for the Company file already opened in QuickBooks. |
| • | If, however, you have already installed FieldOne and have started using it but have not yet imported from QuickBooks: |
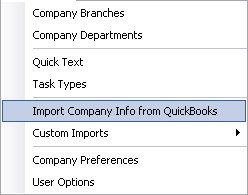
| ► | On the far right, click on the System down-arrow |
| ► | Click Import Company Info From QuickBooks |

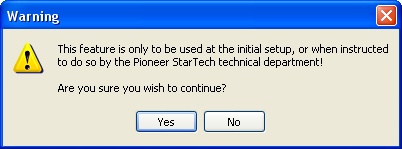
| ► | The following warning will appear: |

Click Yes to continue with the Import process.
| ► | A further screen will appear for you to confirm: |

Make any adjustments and click Import to continue with the Import process.
| ► | If you are Importing from QuickBooks the first time a message will pop-up in QuickBooks, asking "Do you want to allow this application to read and modify this company file?" You need to select one of the following: |
| ▪ | Yes, prompt each time (meaning that this question will come up every time the Synchronization process runs) |
| ▪ | Yes, whenever this QuickBooks company file is open. |
| ▪ | Yes, always; allow access even if QuickBooks is not running. |
| ► | You do not have to check the box "Allow this application to access personal data such as social security numbers and customer credit card information." |
| • | Upon completion, the Import process will notify you of its success. You are now ready to start using FieldOne with your existing QuickBooks data!. |
Page url: http://www.fieldone.com/startech/help/index.html?_qb_steps_to_import_.htm


