Navigation: Basic Working Procedures > Inventory Management > Parts >
Transfer Parts Inventory


|
Navigation: Basic Working Procedures > Inventory Management > Parts > Transfer Parts Inventory |
  
|
You can Transfer Parts Inventory from one Warehouse / Truck to another. The transfer calculations will have the following effects:
| • | Decrease the Qty On Hand in the Source Warehouse |
| • | Increase the Qty On Hand in the Destination Warehouse |
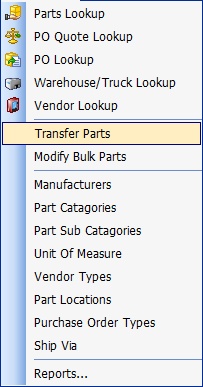
On the Work Menu at the top of the screen, click the Inventory down-arrow, and select Transfer Parts.

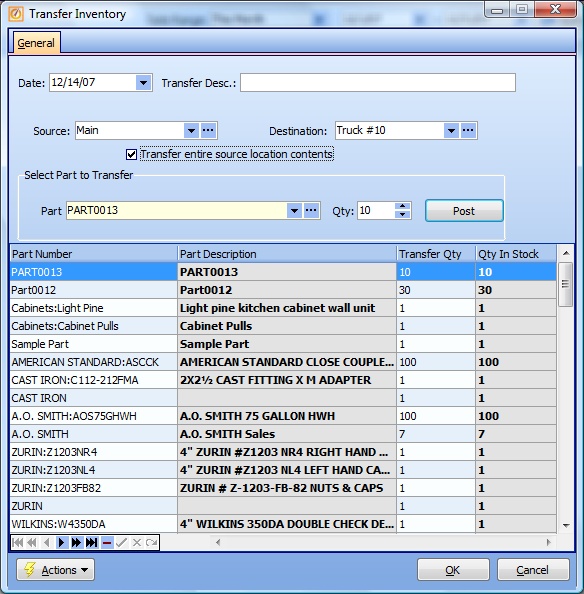
The Transfer Inventory screen will appear. It has a header to identify the Warehouse / Truck locations and a bottom section to display and work with the final Prepared Group of Parts and Transfer Quantities prepared for the transfer.

This screen, with multiple details, is a DataView, where you can adjust the layout, print or export the data (see DataView Menu). There may also be a header panel above for the "parent" of the details, or a DataView Footer below. By using the Field Chooser function you may be able to add more fields to the display from the Customization Screen.
The check-box called Transfer entire source location contents provides two methods to enter the Parts for the Prepared Group of Parts. You can use a combination of approaches, if desired.
| 1. | Check the flag - for all Parts in the Source Warehouse to show below, then use the Select Part to Transfer fields to change Quantities |
| 2. | Un-check the flag - and use the Select Part to Transfer fields to transfer just a few items |
Header controls:
Source:
The Warehouse / Truck source from which you would like to transfer. (See Lookup Combo Box. To add an entry, click the Ellipsis button (…) and select New.)
Destination:
The Warehouse / Truck location to which you would like to transfer. (See Lookup Combo Box. To add an entry, click the Ellipsis button (…) and select New.)
Transfer entire source location contents:
Checkbox selection will cause all Parts in the Source Warehouse / Truck to display in the Prepared Group below. See Detail Controls for how to change lines within this group.
Note: You can use the Minus Sign Icon (-) to delete Part detail lines, to omit them from the transfer.
Detail controls:
The control fields below work in combination with the DataView of the Parts details to add, change, and display the final Prepared Group for Transfer when you click OK and exit the screen.
Select Part to transfer:
The Part selected to work with in detail.
| • | Use to select individual Parts. (See Popup Lookup Combo Box, used for large Parts lists. To add an entry, click the Ellipsis button (…) and select New.) |
| • | Use for any of the Parts detail lines displayed below, to change the Transfer Qty. Click to select a detail and the Part will appear above in this work field. |
Qty:
The planned Transfer Quantity
| • | Qty for individual parts - default is (1), change to desired Transfer Qty |
| • | Qty for Parts displayed below - default is the displayed Transfer Qty, change here to update that field below |
Post (or Post and New) button:
The Post activity refers only to activity on this screen. It does not perform the Inventory Transfer. This button is used to build the complete Prepared Group of Parts for the Transfer.
After you have completed work with Select Part to transfer, use this button to place the Prepared Part Transfer in the Prepared Group below.
| • | Post and New - takes a new entry from Select Part to transfer, adds it to the Prepared Group below and opens the work area for a new selection |
| • | Post - takes the detail line from below that you have changed in Select Part to transfer and replaces it below with the updated Transfer Qty |
Note: You can use the Minus Sign Icon (-) to delete Part detail lines from the Prepared Group, to omit them from the transfer.
When completed:
Remember, the Post button does not actually perform Transfer Inventory. It just helps to build the Prepared Group that is ready for the action.
The actual Transfer Inventory action occurs when you click the OK button and exit the screen.
Page url: http://www.fieldone.com/startech/help/index.html?__inventmanage_parts_transfer_parts_inventory_.htm